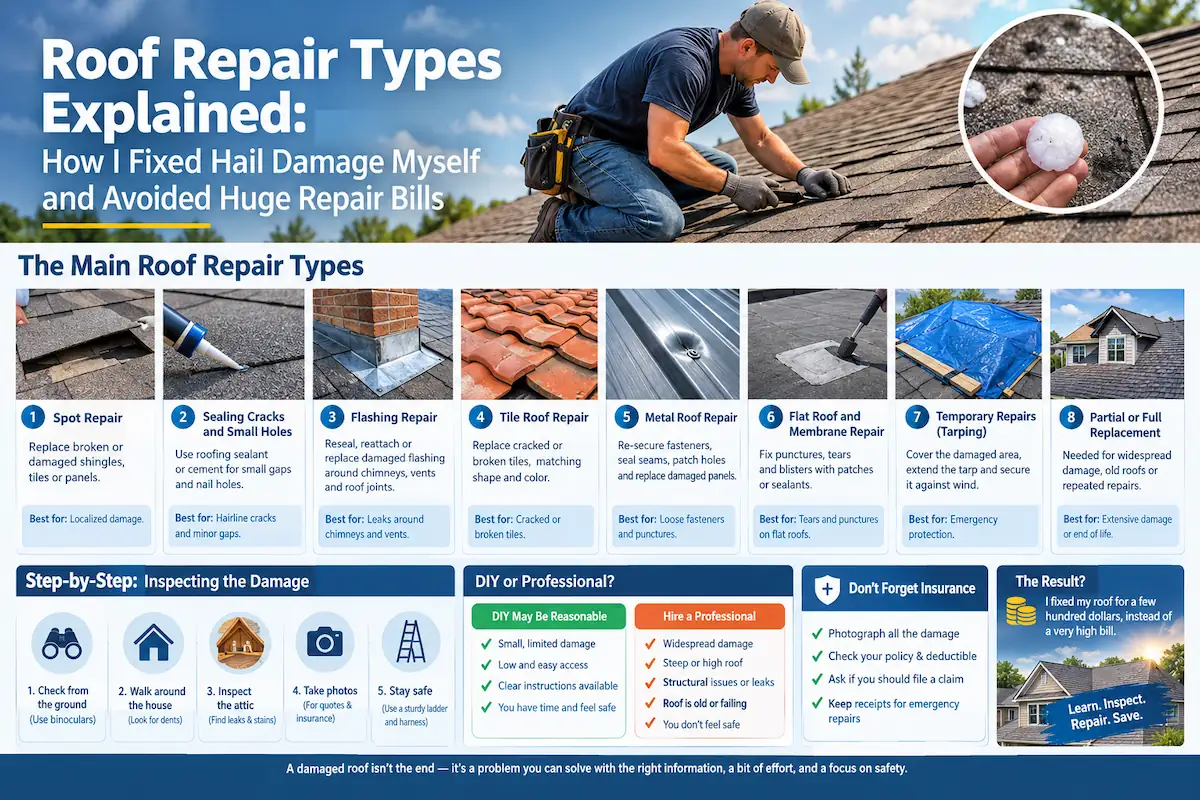
Roof Repair
After a hailstorm, I found that parts of my roof had broken. It wasn’t a collapse, but it was serious enough that I knew I couldn’t ignore it, because a damaged roof only gets worse with the next rain.
What came next surprised me more than the hail did. I talked to many roofing companies, and every one of them quoted me figures I found absurd for the damage I had. I’m not saying every roofer overcharges. But after hearing one outrageous number after another, I started wondering whether the job was really as complicated as they made it sound.
So I tried something different. I watched repair videos on YouTube, learned how the work is actually done, and decided to do it myself. I ended up fixing the roof for a few hundred dollars. That saved me from a very high bill, and it taught me a lot about how roof repairs work.
In this guide I’ll share what I learned: the main roof repair types, how to figure out what you’re dealing with, and how to decide between doing it yourself and hiring someone.
Why Hail Damages Roofs
Hail hits a roof with real force, and the damage depends on the size of the stones, the wind, and what your roof is made of. Typical results include:
- Broken, cracked or dented roofing pieces
- Bruised areas that look intact but are weakened underneath
- Damage to flashing, vents and gutters
- Dents in metal parts
The tricky part is that some damage isn’t obvious from the ground. A roof can look fine and still have weak spots that leak weeks later.
Step One: Inspect the Damage Safely
Before you decide anything, you need to understand the damage.
- Start from the ground. Look at the roof with binoculars. Check for broken pieces, missing sections and debris.
- Walk around the house. Dents on gutters, downspouts and window frames are a good sign the hail was strong.
- Check the attic. Look for damp spots, light coming through, or stains on the wood after rain.
- Take photos. Photograph everything. You’ll need them for comparing quotes, planning repairs and possibly insurance.
- Only go onto the roof if it’s dry, the weather is calm, and you feel safe. Use a sturdy ladder and shoes with good grip, and wear a safety harness on steeper roofs. No repair is worth a fall.
The Main Roof Repair Types
Not all roof repairs are the same. Here are the most common ones and when each applies.
1. Spot Repair of Broken or Damaged Pieces
This is the most common repair after hail: replacing individual damaged shingles, tiles or panels. You remove the broken piece, fit a matching replacement and secure it properly. If only some pieces are damaged, this is often all you need.
Best for: Localized damage on an otherwise healthy roof.
2. Sealing Cracks and Small Holes
For small cracks, nail holes or minor gaps, roofing sealant or roofing cement can close the opening. It’s quick and cheap, but it’s a patch, not a permanent fix for large damage. Always apply it to a clean, dry surface.
Best for: Hairline cracks, exposed nail heads and small gaps.
3. Flashing Repair
Flashing is the metal strip that seals joints around chimneys, vents, skylights and wall connections. Hail and age can dent or loosen it. Damaged flashing is a leading cause of leaks, so inspect it carefully. Repairs involve resealing, reattaching or replacing the section.
Best for: Leaks around chimneys, vents and roof joints.
4. Tile Roof Repair
On clay or concrete tile roofs, damaged tiles are replaced individually. Tiles are heavy and brittle, so walk carefully and avoid putting weight on cracked ones. Matching the shape and color matters for both looks and fit.
Best for: Cracked or broken tiles.
5. Metal Roof Repair
Metal roofs handle hail well, but they can dent, and fasteners and seams can loosen. Repairs include re-securing screws, sealing seams, patching small holes and replacing damaged panels. Light dents are often cosmetic and don’t affect performance.
Best for: Loose fasteners, open seams and punctures.
6. Flat Roof and Membrane Repair
Flat and low-slope roofs usually use membranes or coatings, and hail can puncture or crack them. Small tears are repaired with patches or compatible sealants, while large damaged areas may need a professional.
Best for: Punctures, tears and blisters on flat roofs.
7. Temporary Repairs (Tarping)
If you can’t fix the damage right away, a tarp is a smart emergency measure. Cover the damaged area, extend the tarp well beyond it, and secure it so wind can’t lift it. This buys you time to compare quotes or wait for dry weather.
Best for: Emergency protection until a proper repair.
8. Partial or Full Replacement
When damage is widespread, the roof is very old, or repairs keep failing, replacement may be the only sensible option. This is a major job and typically one for professionals.
Best for: Extensive damage or roofs at the end of their life.
What My Experience Taught Me
Looking back, a few lessons stand out:
- Quotes can differ wildly, and it pays to question them. Hearing high numbers from company after company made me stop and ask what the job really involves.
- Learning how the work is done is powerful. Watching repair videos gave me enough understanding to judge what was realistic and to do the work myself.
- The savings can be huge. Fixing the roof myself cost a few hundred dollars and saved me from a very expensive bill.
If you’re facing a similar situation, here is what I would suggest: inspect carefully, take photos, learn the repair properly before you start, and stay safe at every step.
Don’t Forget Insurance
Hail damage is often covered by homeowner’s insurance, depending on your policy. Before you repair anything:
- Photograph all the damage.
- Read your policy and check the deductible.
- Ask your insurer whether you should file a claim and whether they need to inspect first.
Keep receipts for emergency repairs, since some policies reimburse them.
DIY or Professional: How to Decide
DIY may be reasonable when:
- The damage is small and limited to a few spots
- The roof is low and easy to access safely
- You can find clear instructions for your roof type
- You have the time and are comfortable working carefully
Hire a professional when:
- The damage is widespread or the roof is steep or high
- You see structural damage, sagging or widespread leaks
- The roof is old and failing everywhere
- You don’t feel safe working at height
If you do hire someone, get at least three written quotes, ask for a breakdown of materials and labor, check reviews and the warranty, and never pay in full before the work is done. If one quote is far above the others, ask them to explain exactly why.
Mistakes to Avoid
- Ignoring small damage. It almost never fixes itself.
- Using the wrong materials. Mismatched parts can leak or fail.
- Skipping safety. Wet or steep roofs are dangerous.
- Covering problems with sealant. Sealant is fine for small gaps, not for broken parts that need replacing.
- Not documenting damage. Photos protect you with insurers and contractors.
Final Thoughts
A damaged roof feels like an emergency, and it’s easy to panic when the first quotes come in sky-high. My experience taught me that it pays to slow down, understand the problem, and compare your options. Learning how the repair works saved me a lot of money. That said, know your limits. Small repairs can be a rewarding DIY project, but big, steep or structural jobs are worth leaving to a qualified professional.